

At a Glance
| Best soap | A dedicated pH-neutral car shampoo — not dish soap for routine washing |
| Keep off the paint | Laundry detergent, household cleaners, acetone-based removers (like Goof Off) |
| The fingernail test | If your nail catches in a scratch, it’s through the clear coat — a body-shop job |
| Wash method | Rinse first, two buckets with a grit guard, top-down, never dry-wipe |
| Stickers | Warm gently, peel at a low angle, then a clear-coat-safe remover — never a blade |
| Cold weather | Skip a wash around freezing, but still rinse road salt off the underbody |
Keeping a car’s paint looking good is less about expensive products and more about not damaging it during the wash itself. Most of the fine scratches and swirl marks people notice come from the washing process, not from the road, so the biggest wins are in method rather than materials. This guide covers what soap is actually safe, how to wash without scratching, how to remove stickers and scuffs, whether common adhesive removers hurt paint, and how to handle cold-weather washing. Throughout, the “safety” that matters here is paint safety: what protects the clear coat and what quietly wears it down. The clear coat is the thin, glossy top layer over your car’s color, and almost everything in this guide comes back to protecting it, because once it’s damaged, the fix is far more expensive than the prevention.
Product safety notes here describe generic categories rather than recommending brands; the two named-brand answers are factual safety information, not endorsements. Any repair cost is a range to confirm locally, since body-shop pricing varies widely by vehicle and region.
Table of Contents
What soap is safe to wash a car with?
The only soap that’s truly safe for routine car washing is a dedicated, pH-neutral car shampoo, because it lifts dirt without stripping the wax or sealant that protects the paint. Household products like dish soap and laundry detergent are degreasers designed to cut through grease, and that same strength strips the protective wax off your paint, leaving the clear coat exposed and, over time, looking dull. This is the most-searched question in the whole hub, usually asked by someone standing in the driveway wondering if the dish soap under the sink will do, and the honest answer is that it will clean the car once but shouldn’t be your regular choice. The table sorts the common options and, more usefully, says why.
| Product | Safe on paint? | Why |
|---|---|---|
| Dedicated car shampoo (pH-neutral) | Yes | Cleans without stripping the wax or sealant layer |
| Dish soap | One-off deep clean only | A degreaser — strips protective wax and dries out trim if used routinely |
| Laundry detergent | No | Harsh and alkaline; strips wax and can dull the clear coat |
| Household all-purpose cleaner | No | Not pH-balanced for paint; can etch or dull it over time |
| Citrus adhesive remover (e.g. Goo Gone) | With care | Relatively gentle but strips wax — test first, then wash and re-wax |
| Acetone/xylene remover (e.g. Goof Off) | No | Strong solvents can etch, dull, or strip the clear coat |
| Bird droppings, tree sap, bugs (left on) | Damaging | Acidic — they etch the clear coat if baked on in the sun |
| Road salt (left on) | Damaging | Corrosive to paint and the underbody over time |
The practical takeaway is that a proper car shampoo is cheap insurance, and the one time dish soap has a place is a deliberate strip-down, for example before applying a fresh coat of wax or after using a solvent, not as your weekly wash. Used that way, on purpose and followed by fresh wax, it does exactly the job you want; used every week, it quietly undoes the protection you’re trying to keep. The reason the pH matters is simple: a car’s wax or sealant is a thin sacrificial layer sitting on top of the clear coat, and a degreaser is designed to dissolve oils and films, so every wash with dish soap or detergent takes a little of that protection with it. Do it once and you’ll barely notice; do it every week and the paint gradually loses its gloss and starts to feel rough because the clear coat is now unprotected and collecting contaminants directly. A pH-neutral shampoo cleans the dirt while leaving the wax intact, which is the whole point. Two-bucket rinsing and a good shampoo work together: the shampoo lifts grime without stripping protection, and the method keeps grit away from the paint, so the two habits combined are most of what keeps a finish looking new. For the specifics, see the best household soap to wash a car if you’re in a pinch, and why you should think twice before you use laundry detergent to wash your car.
How do I wash a car without scratching the paint?
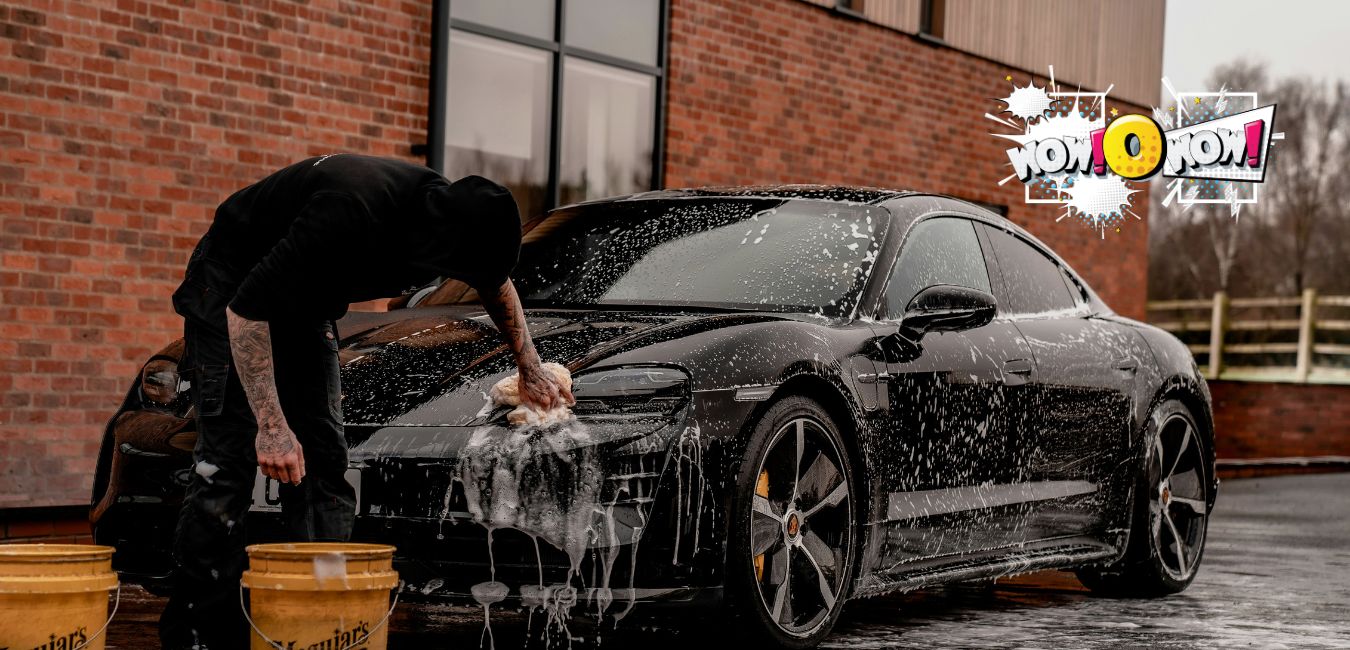
You wash a car without scratching it by never dragging grit across the paint, which means rinsing first, using two buckets, and working top-down. Most of what people call “scratches” are actually swirl marks, fine circular scratches put there during washing when trapped dirt gets rubbed across the clear coat. Those swirls are what you see as a spiderweb haze under direct sunlight or a streetlight, and they come almost entirely from technique, not bad luck, which is good news because it means they’re preventable. The method below is built entirely around not doing that.
- Rinse the whole car first. A thorough rinse floats off loose grit before your mitt ever touches the paint, which is the single biggest cause of swirls. Give the lower panels and wheel areas extra attention, since that’s where the heaviest grit collects.
- Use two buckets. One holds your soapy water, the other clean rinse water. Rinse the mitt in the plain water between panels so you’re not putting grit back into the soap. A grit guard in the bottom of each bucket traps the dirt below the mesh so it can’t get scooped back onto the mitt. This one step, keeping the grit out of your wash water, does more to prevent swirls than any product you can buy.
- Wash top-down. Start at the roof and work down, because the lower panels are the dirtiest and you don’t want that grit carried up to cleaner areas.
- Use a clean microfiber wash mitt. Microfiber lifts and holds grit away from the paint far better than a sponge, which tends to trap it against the surface. If you drop the mitt on the ground, rinse it thoroughly before using it again, since it will have picked up grit.
- Dry with a plush microfiber towel. Blot or gently pull a clean drying towel; don’t scrub. Letting a car air-dry leaves water spots, so dry it promptly rather than walking away.
Caution: never wipe a dry, dirty panel, and never wash in direct sun on a hot panel. Wiping dry dirt is like sanding the paint, and on a hot surface the soap and water dry too fast, leaving spots and streaks. Wash in the shade or when the panels are cool, ideally early morning or evening rather than the middle of a hot day. It’s also worth washing the wheels and lower panels first, or with a separate mitt, because they hold the most abrasive brake dust and grit, and you don’t want that on the mitt you’ll use on the roof. Keeping the glass, headlights, and mirrors clean is also a genuine safety matter, not just cosmetics, since clear lights and windows are part of seeing and being seen; NHTSA’s vehicle safety resources treat visibility as a safety issue. *(Build note: no cluster page exists for “how to wash a car without scratching it” — it’s the hub’s most obvious missing child page; recommend adding it to the map.)*
How do I remove a sticker or decal without damaging the paint?
You remove a sticker safely by warming the adhesive to soften it, peeling slowly at a low angle, and then cleaning off the residue with a remover that’s safe for clear coat, never by scraping with a blade. Rushing this is how people put a permanent gouge in their paint, so the gentle approach is the fast approach in the long run. The adhesive under a sticker is what actually holds it on, and warming it is what makes the difference between a clean peel and a torn mess with residue left behind, so patience at the start saves work at the end.
- Warm the sticker gently. A hair dryer on low, held a few inches away, softens the adhesive so it releases instead of tearing.
- Peel slowly at a low angle. Lift a corner and pull it back against itself, slowly. A low angle keeps the adhesive lifting cleanly rather than snapping and leaving residue, and going slowly lets the warmth keep working on the glue as you go.
- Remove the residue. Use a clear-coat-safe adhesive remover on a microfiber cloth, or a plastic razor rather than a metal one for any stubborn bits. Work the remover in small circles and let it soften the glue rather than grinding at it.
- Wash and re-wax the area. Wash off the remover with car soap and water, then re-wax the spot to restore the protection the remover stripped. Skipping the re-wax leaves that patch of clear coat exposed, which is easy to forget once the sticker is gone.
Caution: never use a metal blade or scraper on paint, and don’t overheat the panel, since too much heat can damage paint and plastic trim. Always test any remover on a hidden area first, like inside a door jamb, and follow the product’s own label. A couple of extra tips make the job cleaner: work on a cool panel in the shade rather than a sun-baked one, and if the adhesive is stubborn, several rounds of gentle warming and wiping beat one aggressive attempt. For dealer badges and emblems stuck on with strong two-sided tape, fishing line or dental floss worked behind the emblem can slice the adhesive without touching the paint, followed by the same warm-and-remove residue steps. For the full walkthrough, see how to remove a sticker from a car without damaging the paint.
Are adhesive removers safe on car paint?
Whether an adhesive remover is safe on car paint depends on its solvent, not its marketing. Citrus-based removers are relatively gentle and generally fine on clear coat with precautions, while acetone- or xylene-based products are strong industrial solvents that can etch, dull, or strip the clear coat. The honest way to judge a remover is by what’s in it, which is why answering by solvent type is more useful than answering brand by brand: the same brand name can cover several very different formulas, so the label’s active ingredients tell you more than the logo does.
Citrus and petroleum-distillate removers, the common household kind, work by swelling the adhesive so you can wipe it away, and they’re mild enough for occasional use on paint if you test first, apply sparingly, don’t let them dwell long, and wash and re-wax afterward, since they do strip wax. Acetone and xylene solvents are a different category: they’re formulated for hard, non-painted surfaces and can soften or dissolve clear coat, so they belong nowhere near your paint. There’s a third group worth knowing about, dedicated automotive tar-and-bug removers and clay bars, which are made specifically for paint and are the safest choice when you have a lot of residue to deal with. Even diluted isopropyl alcohol works for light adhesive, again followed by a wash and wax.
Caution: the two most-searched brands land on opposite sides of this line. A citrus remover such as Goo Gone is relatively gentle if used carefully and washed off, whereas an acetone/xylene product such as Goof Off can permanently damage paint and clear coat. Confusing the two is a costly mistake, and the similar names make it an easy one, so it’s worth double-checking the product before it touches the paint. If a solvent does dull a patch of clear coat, a light haze can sometimes be polished out by a professional, but a stripped area needs repainting, which is exactly why testing on a hidden spot first matters so much. Whatever you use, spot-test it on a hidden area, and wash the area afterward to neutralize the solvent. For the brand-specific facts, see whether Goo Gone is safe on car paint and whether Goof Off is safe for car paint (the short answer to the second is no).
How do I remove a paint scuff or transfer mark?
Whether a scuff comes off at home depends on one quick test: run your fingernail across it. If your nail glides over it, the mark is sitting on top of your clear coat and can usually be polished off; if your nail catches in it, the scratch has gone through the clear coat and needs a body shop. That fingernail test is the single most useful thing to know about scratches, because it tells you instantly whether you’re facing a five-minute fix or a repaint, with no special tools and no guesswork. It works because your paint is layered, primer, color, then a clear protective coat on top, and a mark that only disturbs the clear coat’s surface can be leveled, while one deep enough to feel has passed through it entirely.
A surface transfer mark, paint or rubber from another object smeared onto your clear coat, often looks worse than it is and comes off with a mild polishing or rubbing compound worked gently by hand. Start with the least aggressive product, since compounds remove a tiny amount of clear coat and you can always step up if needed. A common example is a scuff from a shopping cart or another car’s bumper in a parking lot: the color you see is often the other object’s paint sitting on top of yours, not damage to your own, and it wipes or polishes away more easily than people expect. A scratch your nail catches in has cut through the clear coat into the color or primer, and no amount of polishing rebuilds that; it needs filling, painting, and clear-coating, which is body-shop work. There’s a middle case worth knowing: a scratch that’s into the clear coat but not through it can sometimes be improved with careful machine polishing, but that’s a judgment call, and going too far removes clear coat you can’t replace, so it’s easy to make worse.
This is the hub’s stop-here line: if the fingernail catches, hand it to a professional rather than attacking it with heavier compounds, because aggressive DIY on a deep scratch usually just burns through more clear coat around it and makes the eventual repair larger. It’s the same logic as the safe-to-drive verdict on the diagnostic hubs: a simple, memorable test that tells you where your own efforts stop and a professional’s begin. Touch-up paint has a place for tiny chips, filling them to stop rust and hide the mark, but it won’t make a deep scratch disappear, and over-applying it usually looks worse than the chip did. For the fixes, see how to remove a paint scuff from a car, and if it does go to a shop, how to clean a car after body repair and how long it takes to paint a car cover what comes next.
Is it too cold to wash my car?
It’s generally too cold to wash a car when the temperature is around freezing (about 32°F / 0°C) or below, because water can freeze in door seals, locks, and on the paint before you finish, and a frozen film is easy to damage. Washing in a heated garage or on a mild winter afternoon that stays above freezing for a few hours afterward avoids most of that risk. The problem isn’t just discomfort: water that freezes in a door or trunk seal can glue it shut or tear the rubber when you force it, and ice on the paint is abrasive if you then wipe it.
The winter complication is that you can’t simply skip washing until spring, because road salt is corrosive and does real damage to paint and the underbody the longer it sits. That’s the genuine trade-off this question hides: freeze risk on one side, salt corrosion on the other. The practical answer is to pick milder days, focus on rinsing salt off the lower panels and underbody, and dry the door seals, jambs, and locks afterward so water doesn’t freeze them shut overnight. A touchless or drive-through wash with heated bays and air dryers is often the smarter winter choice than a driveway hand wash, since it rinses salt without leaving standing water to freeze. If you do hand wash, doing it midday when temperatures peak, and finishing well before dusk, gives the car time to dry before the overnight freeze. In regions with hard winters, an underbody rinse now and then through the season is the most valuable thing you can do for the car’s long-term health, since that’s where salt does its worst, rust-inducing work out of sight.
Caution: after any near-freezing wash, dry the rubber seals and door jambs, and don’t engage a frozen parking brake or force iced-up seals. A parking brake left on in freezing weather after a wash can freeze in the engaged position, and forcing a frozen door seal can tear the rubber, so a little drying at the end prevents a frustrating morning. The National Weather Service’s cold-weather information is a good reference for when conditions are genuinely below freezing, and AAA’s car-care guidance covers washing road salt off over winter. For the threshold in detail, see what temperature is too cold to wash your car.
How often should I wash my car?
How often to wash comes down to what your car is exposed to, not a fixed schedule, because the things that actually damage paint, road salt, bird droppings, tree sap, and industrial fallout, do their harm by sitting on the surface. A car garaged in a mild climate can go longer between washes than one parked under trees or driven on salted winter roads. There’s no single correct interval, and washing too often with poor technique can actually do more harm than washing less often carefully, so the goal is removing what’s harmful rather than hitting a number on the calendar.
As a general rhythm, washing every two weeks keeps most cars in good shape, but the more important habit is spot-cleaning the damaging stuff promptly. Bird droppings are acidic and can etch a permanent mark into clear coat within a day or two in the sun, tree sap hardens and bonds, and road salt corrodes, so those come off as soon as you notice them rather than waiting for wash day. Climate and parking matter a lot here: a car kept in a garage in a dry, mild region genuinely needs washing far less often than one parked outdoors under trees, near the coast where salt air accelerates corrosion, or driven through salted winter roads. Regular washing also preserves the wax layer, which is the paint’s actual protection, so it’s maintenance rather than just appearance. A reasonable way to think about it is to wash on a routine that fits your climate, but treat bird droppings, sap, and salt as exceptions to deal with immediately regardless of when your last wash was. *(Build note: no cluster page exists for “how often should I wash my car” — a strong candidate to add to the map.)*
How do I remove tree sap, bird droppings, and water spots?
Tree sap, bird droppings, and water spots each need a slightly different approach, but the shared rule is to remove them gently and promptly before they etch the clear coat. These three are the everyday contaminants most likely to leave a permanent mark, and all three get harder to remove and more damaging the longer they sit. The common thread is heat and time: sun bakes bird droppings and sap onto the surface and drives water-spot minerals into the clear coat, so a contaminant caught the same day is far easier and safer to remove than one left for a week.
Bird droppings are acidic and should come off as soon as you spot them, because in warm sun they can etch a dull outline into the clear coat within a day or two. Soften them with a wet cloth laid over the spot for a minute, then wipe gently rather than scrubbing dried-on material, which drags grit across the paint. Tree sap hardens into a tough bond, and the safe way to lift it is to soften it first, with warm soapy water or a dedicated bug-and-tar remover, then wipe rather than pick at it with a nail or blade. Water spots are mineral deposits left when hard water dries on the paint; a fresh spot often wipes off with a detailing spray, while stubborn baked-on spots may need a mild polish. A common way people create water spots is letting a car air-dry after a wash, or washing in the sun, so drying promptly with a clean towel prevents most of them in the first place. In all three cases, the gentler approach wins, and re-waxing afterward restores the protection that both the contaminant and the cleaning can strip. *(Build note: no cluster page exists for removing sap, bird droppings, or water spots — a strong candidate to add to the map.)*
Do automatic car washes damage paint?
Automatic car washes can damage paint, but it depends on the type: older brush-style washes are the main culprit for swirl marks, while touchless washes avoid contact at the cost of using stronger chemicals. Knowing the difference lets you use them sensibly rather than avoiding them entirely. The blanket claim that “automatic washes ruin your paint” is out of date, since the equipment has improved a lot, but the underlying physics hasn’t changed: anything that touches the paint can drag grit, and anything that cleans without touching has to lean on chemistry instead.
Brush and cloth automatic washes drag those materials across many cars a day, and if the brushes aren’t well maintained they carry grit from the last vehicle onto yours, which is exactly how swirl marks form. Modern soft-cloth washes are much gentler than the stiff older brushes, but the risk is still contact-based. Touchless washes spray high-pressure water and detergents without touching the paint, which avoids swirls, but they rely on stronger chemicals to clean without agitation, and they don’t always get a car fully clean. For a car you care about, a careful hand wash with the two-bucket method is gentler than any automatic option, but a good touchless wash is a reasonable compromise when hand washing isn’t practical, especially in winter for rinsing off salt. If you do use an automatic wash, the soft-cloth and touchless options are the safer picks, and skipping any with obviously worn or dirty brushes avoids the worst swirl risk. One more tip: many automatic washes offer an underbody rinse, which is genuinely useful in winter for flushing salt off the parts you can’t easily reach by hand, and it’s usually a cheap add-on well worth taking in a region that salts its roads. *(Build note: no cluster page exists for “do automatic car washes damage paint” — recommend adding it to the map.)*
How do I protect the paint after washing?
You protect paint after washing by adding a sacrificial layer on top of the clear coat, and the three common options are wax, sealant, and ceramic coating, which trade off longevity against effort and cost. All three do the same core job: they take the hits from UV, contaminants, and mild acids so the clear coat doesn’t have to, and they make the next wash easier because dirt sticks less. Think of it as the difference between waxing a floor and leaving it bare: the protection wears away and gets renewed, while the surface underneath stays intact.
Carnauba wax gives a warm shine and is easy to apply but doesn’t last long, typically a couple of months, so it suits people who enjoy the process. A synthetic sealant lasts longer, often several months, and is a bit more durable, making it a practical middle ground. A ceramic coating bonds to the clear coat and lasts a year or more, offering the strongest protection, but it’s the most demanding to apply correctly and the most expensive, and it doesn’t make paint scratch-proof despite the marketing. The right choice is whichever you’ll actually keep up with, since a reapplied wax protects better than a neglected ceramic coating. A simple way to check whether your protection is still working is the water-beading test: if water still beads up and rolls off the paint, the layer is intact; when water starts sheeting flat across the surface instead, it’s time to reapply. For most owners a good sealant applied two or three times a year hits the sweet spot of real protection without the cost and fuss of a full ceramic job, though a ceramic coating can make sense on a new or freshly corrected car you plan to keep. Whichever you pick, it goes on after a proper wash and dry, which is why the washing method above is the foundation for everything else. *(Build note: no cluster page exists for “wax vs sealant vs ceramic coating” — a strong candidate to add to the map.)*
Frequently asked questions
Can I use dish soap to wash my car?
Dish soap will clean a car, but it’s a degreaser, so it strips the protective wax and can dry out plastic trim if used regularly. It’s fine for a one-off deep clean, for example before waxing or after using a solvent, but it isn’t a substitute for a pH-neutral car shampoo. For routine washing, the car shampoo protects the finish; the dish soap slowly wears it down.
Do automatic car washes damage paint?
They can, depending on the type. Older brush-style washes are the main cause of swirl marks, because the brushes drag grit across the paint. Modern soft-cloth washes are gentler, and touchless washes avoid contact entirely but use stronger chemicals. For a car you care about, a careful two-bucket hand wash is gentlest, with a good touchless wash as a reasonable backup.
How often should I wash my car?
It depends on exposure rather than a set schedule. Every two weeks keeps most cars in good shape, but the bigger priority is removing damaging contaminants promptly: bird droppings, tree sap, and road salt harm paint if left on. Those come off as soon as you notice them, since bird droppings can etch clear coat within a day or two in the sun.
Is Goo Gone safe on car paint?
Goo Gone’s citrus formula is relatively gentle and generally safe on clear coat if you use it carefully: test a hidden area first, apply sparingly, don’t let it dwell more than a few minutes, keep it out of direct sun, then wash and re-wax the spot since it strips wax. Avoid industrial-strength versions on paint, and don’t confuse it with the far harsher Goof Off.
What’s the fastest way to tell if a scratch needs a body shop?
Run your fingernail across it. If your nail glides over the scratch, it’s on top of the clear coat and can usually be polished out at home. If your nail catches in it, the scratch has gone through the clear coat, and no polishing will rebuild that layer, so it’s a body-shop repair. That one test saves a lot of wasted effort on scratches that can’t be buffed away.
Should I wax my car, and how often?
Waxing is worth it because the wax, not the clear coat, takes the daily hits from UV, contaminants, and mild acids. A traditional carnauba wax lasts roughly two to three months, so reapplying a few times a year keeps a protective layer in place. A synthetic sealant lasts longer. The best schedule is whichever you’ll actually keep up with, since regular protection beats an occasional perfect job.
What to do next
Start with the method, since most paint damage happens during washing: use a real car shampoo, rinse first, work top-down with two buckets, and never dry-wipe a dirty panel. For stickers, warm and peel gently, then use a clear-coat-safe remover and re-wax. For adhesive removers, judge by the solvent, gentle citrus over harsh acetone. And for any scratch, use the fingernail test: if your nail catches, it’s through the clear coat and it’s a body-shop job rather than something to buff harder. In winter, pick milder days but still rinse the salt off, and dry the seals so they don’t freeze overnight. The thread running through all of it is that prevention is cheap and repair is expensive, so a protected, gently-washed car stays looking good for far less effort than fixing damage after the fact. None of this requires expensive gear: two buckets, a grit guard, a microfiber mitt, a plush towel, a proper shampoo, and a wax are a modest kit that will keep almost any car’s paint in good shape for years, and the habits matter more than the products. For everything on keeping your car healthy, see the complete automotive care hub.
